Linear Transform in 3D Slicer
Place AC and PC Fiducials
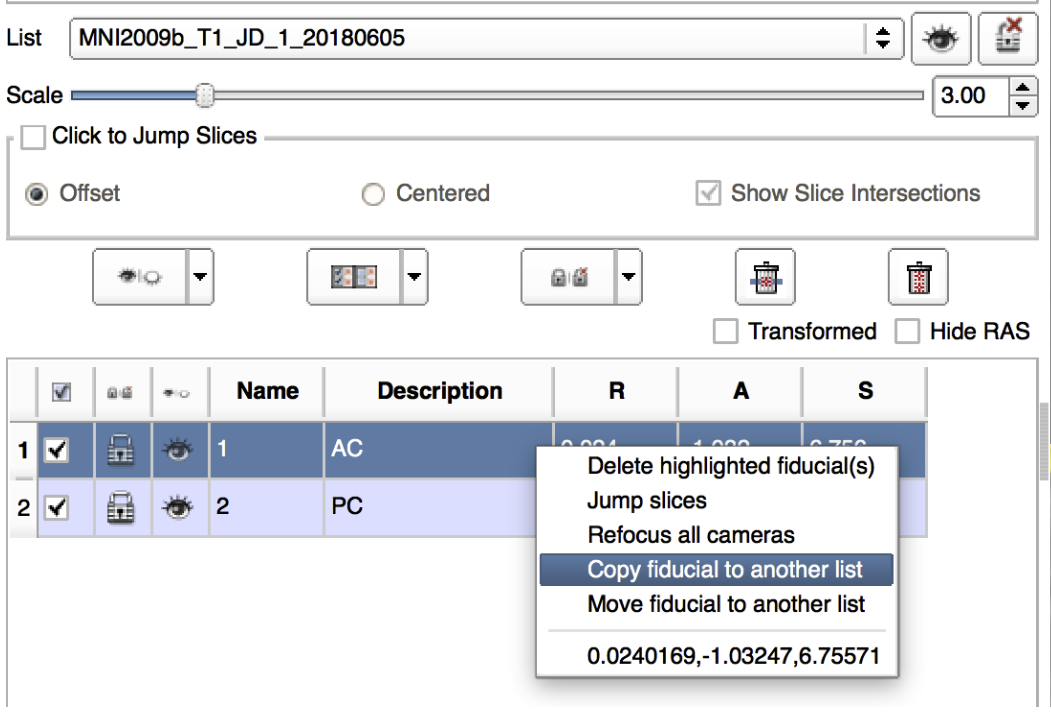
After creating the Markups list as described above, the process begins by placing the anterior commissure landmark (for more information, see the Section below entitled Fiducial Placement Details). Once placed, click on the corresponding row in the Markups Module list and change the Name to “1” and Description to “AC”. Next, place the posterior commissure landmark (see Section Fiducial Placement Details). Click on the corresponding row in the Markups Module list and change the Name to “2” and Description to “PC”.
Create new AC-PC Transform
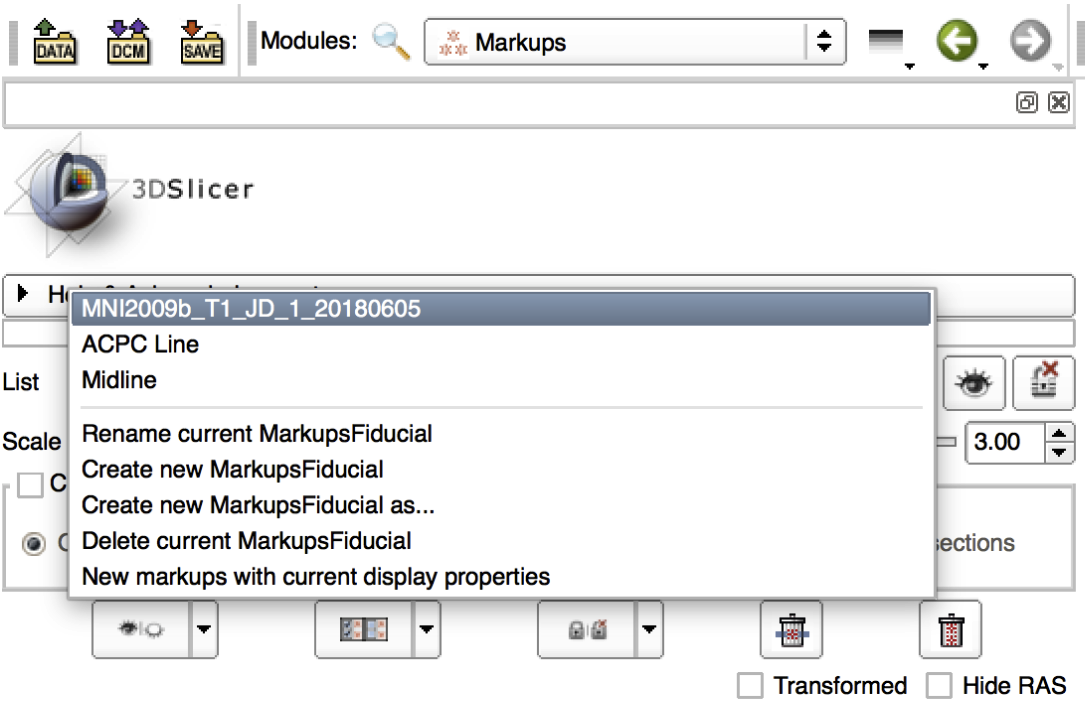
The images first have to be AC-PC aligned using the ACPC Transform Module. Within the Markups Module, we next have to create two new lists: “ACPC Line” and “Midline” by clicking “Create New MarkupsFiducial as…” then entering the name “ACPC Line” and separately “Midline”.
Next copy both AC and PC fiducials into “ACPC Line” and “Midline” Lists. To do this, right click on the individual fiducials (AC and PC) and select “Copy fiducial to another list” then add to both “ACPC Line” and “Midline” lists.
Next, you will need to place a third fiducial marker in the “Midline” list. Select “Midline” list and place a fiducial marker in the superior interpeduncular fossa (Fid03 below; axial view to targeting) and name it Midline. Alternatively, use the intermamillary sulcus (Fid11 below).

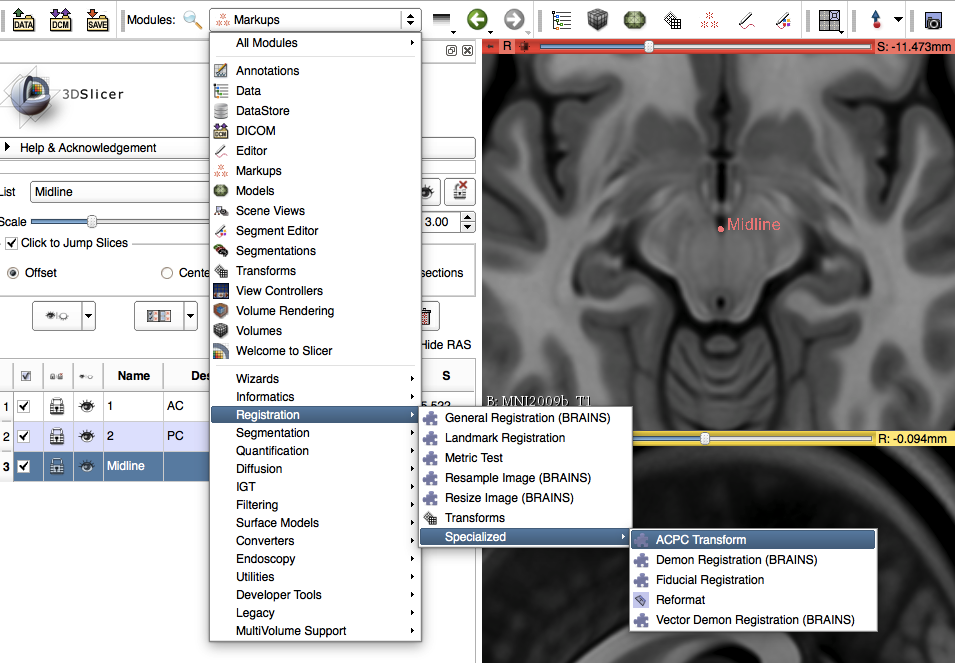
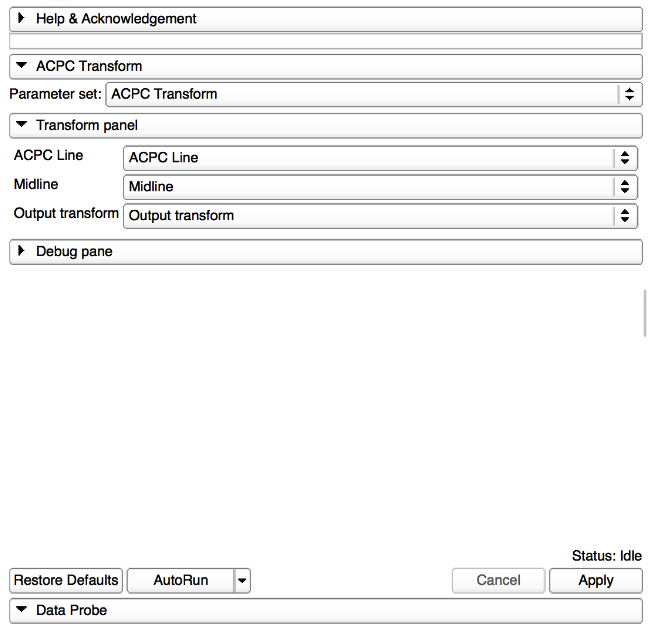
Next, you will perform the ACPC transform to realign the MRI volume. Under modules select Registration>Specialized>ACPC Transform (Left image below). Under the “ACPC transform” tab, select the “Parameter Set” dropdown tab and select “ACPC transform”. Below that is the “Transform Panel”. Under “ACPC Line” dropdown tab select “ACPC Line”, under “Midline” dropdown tab select “Midline”, and under “Output transform” dropdown tab select “New Linear Transform” and name it “Output Transform”. Next, click “Apply” at the bottom of the window (image below).
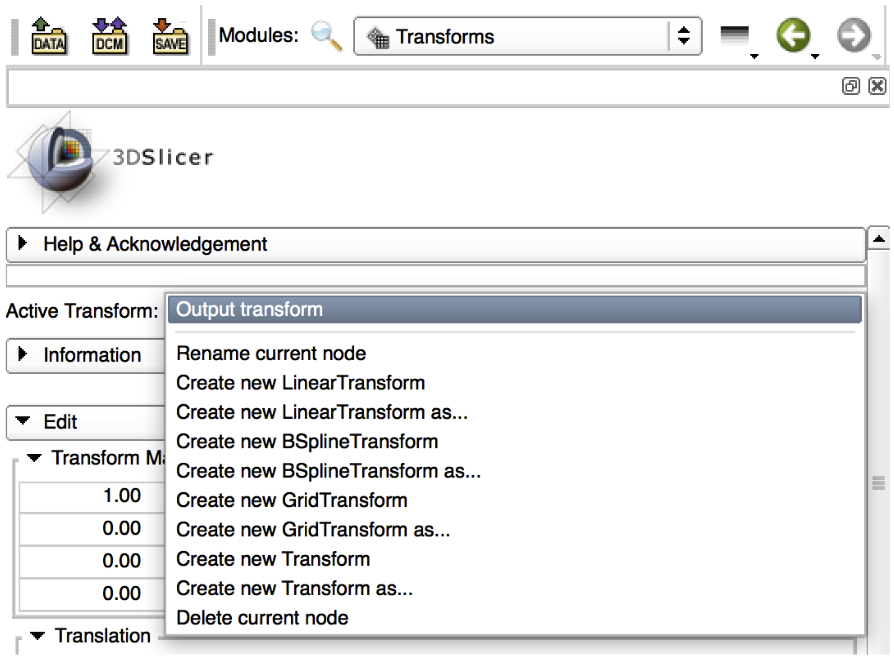
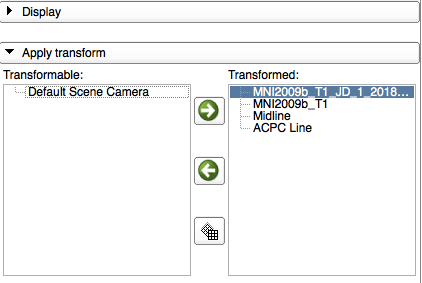
Finally, under “Modules” go to “Transforms.” Under the “Active Transform” dropdown tab select “Output Transform” as the active transform. Next, under the “Apply Transform” menu, Select all 4 lists (i.e the original loaded volume, ACPC Line, Midline etc.) and click the arrow pointing right to transfer them from “Transformable” to “Transformed.” Your image and fiducials should shift to realign with the proper orthogonal axis.